| Remove unwanted/needed
material - DVD Remake |
Step 3: Edit the DVD structure and operation.
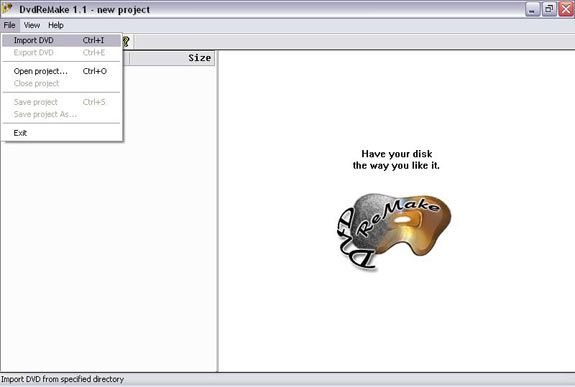
Open DVD Remake.
File>Import dvd.
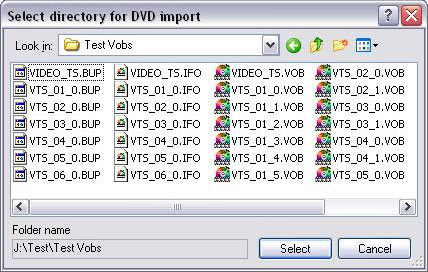
Step 4: Select
folder where ripped DVD files are stored.
Select folder where ripped DVD files are stored,
then hit select. You do not need to open a Vob or ifo, just
open the full folder itself.
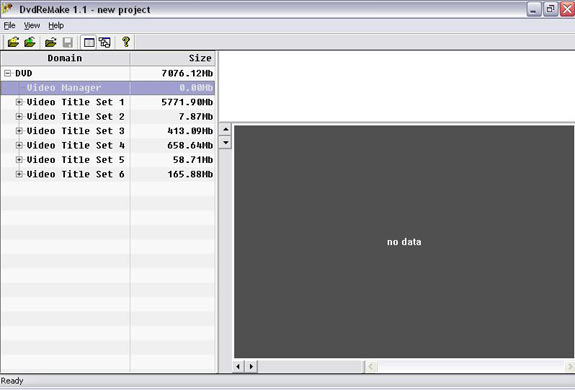
Your display window will look something like
this.
Step 5:
Expand the VTS Menu tree so that
you can see what is in there.
Tip: When you start to edit, It is best
to work from bottom of tree upwards.
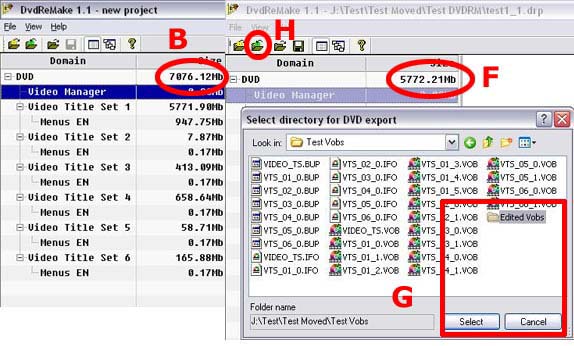
Before we start you can see that the original
size of DVD folder is 7076.12mb.(B)
Lets see how much we can cut by removing unwanted cells and
menus.

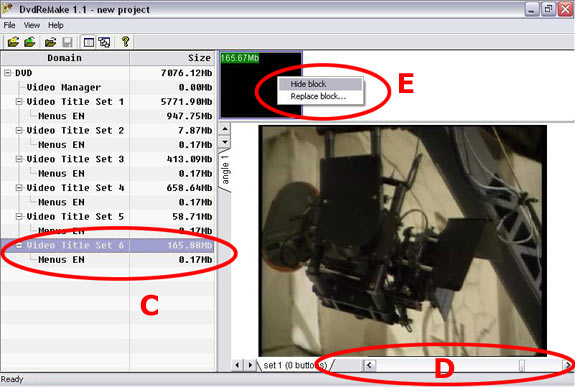
Step 6:Start to edit
menus and movie cells.
First I highlight a VTS set. In this case VTS
6.(C)
I then use the scroll bar at the bottom
(D) to preview a movie cell
to see if its a file I want to keep or remove.
To remove a cell, right click in the cell (E)
you are playing at the top of window which is highlighted
with a border around it and select Hide Block.You can
also hide the "Menu EN" block that corresponds
with the movie cell you have hidden.
Tip: Make
sure you check the first few opening frames and the last few
so you know exactly where each cell starts from and ends up
finishing at, to make sure you don't remove anything that
make the DVD structure invalid, otherwise it may render your
project unusable.
When you look at the tree on the left you can
see I have removed most things so far. Now its the tricky
part, removing the menus and movie cells which are part of
the DVD navigation.
Step 7: Edit movie and
menu cells.
Start from left to right
in the top movie and menu cells area. Highlighting each cell
then scrolling through it with slider remember to check first
and last few frames.
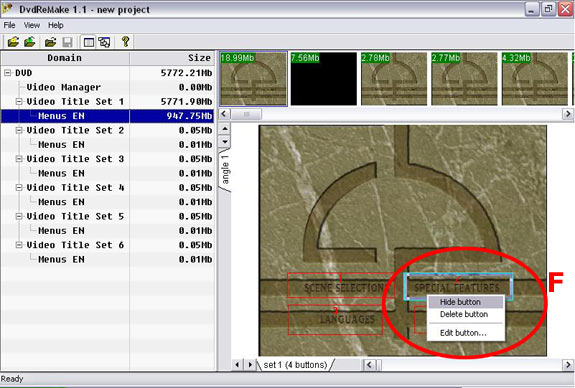
Ok now I'm at the first
menu with a button I want to hide....."Special Features"
From here on I am going to hide blocks that have anything
to do with Special Features. Right click special features
button then "Hide Button" (F)
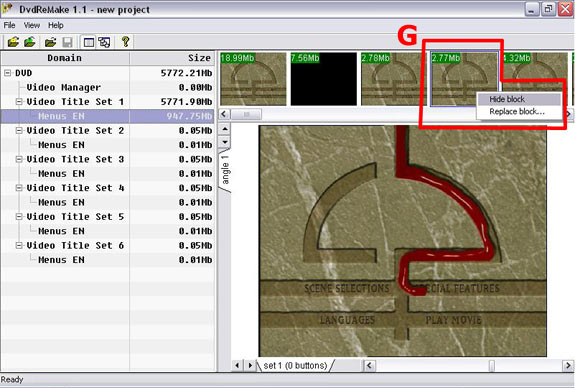
On the original disc, when
I press the "Special Features" button, the action
I would get from pressing this button would be the following
movie cell, the blood flows from top to special features
but as I don't need this anymore I will go to the movie cells
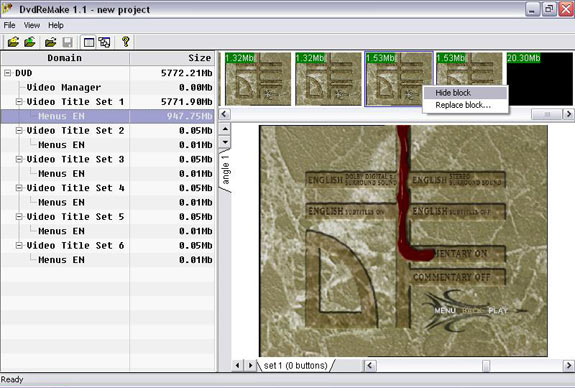
at the top, right click and "Hide Block" (G)
Now its just a case of going through steps
6 & 7 with all the VTS Sets on the left, checking
each of the cells in the top window of DVDRemake.
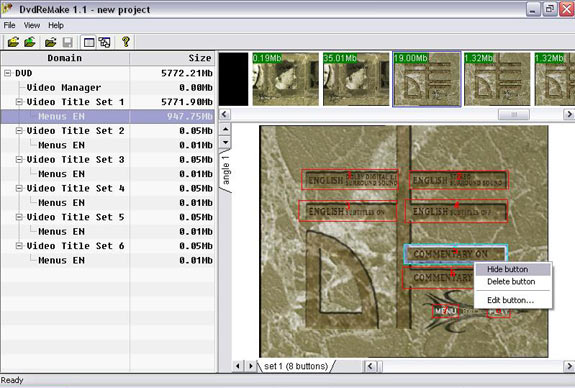
As another example of steps 6 and 7, here is
what I did with the "Audio commentary button"
and the relative video cells that precide each button.
When you have gone through each VTS set and
cell, it is then time to output your new edited DVD.
As you can see in the images below the filesize
has been reduced from
(B) 7076.12mb to (F)5772.21mb.
Step 8: Export edited
dvd files
Now its time to export your project. Go to
export folder icon (H)
click
and create
a folder (I put it in same folder so I can find it easy).
Double click folder you have just created. When the new folder
is open hit select. (G)
Your project will now output to folder. This process
will take approx 15 mins.When your project is completed exit
the program, it will ask you do you want to save project.
Hit yes, give it a name just incase you need to come back
to it.
Important
For Ifoedit.
If you are going to be removing any audio streams make
a note of the biggest VTS as this is usually the main
movie and it will be where the foreign audio tracks or directors
commentary will be located.
Next Step: Check
edited files from DVDRM in software DVD player
|