| Users say: |
DvdReMakePro is a very powerful tool with an easy to use GUI... I appreciate the easiness of your tool compared to other.
Kind regards.
Rosolino L.
|
|
More...
|
|
|
To replace menu it is necessary to:
- author new menu with any authoring application you have and import this dummy disk into DvdReMake Pro;
- replace start-up menu with new one (PGC with start-up menu is a "Root menu" in last VTS);
- edit button commands in new start-up menu to make them the same as in original;
- replace color table (CLUT) of the start-up menu PGC so that menu will have same highlight colors as in the dummy dvd;
Step 1. Very basic authoring application that came bundled with the DVD burner was used to create a dummy DVD with one menu. Here is how it looks imported into DvdReMake Pro:

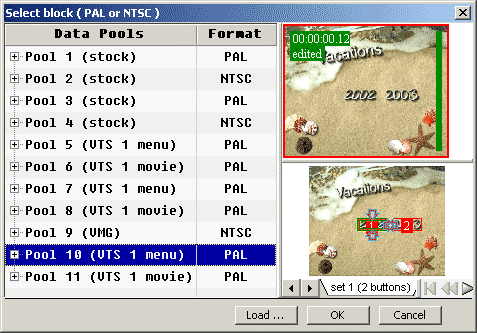
Step 2. Now we are ready to replace default menu with the one we’ve created. Open menu domain of last VTS, right click on frame with start-up menu and select "Replace block…".

Select replacement menu and hit "OK" (you have already imported your dummy DVD, right?).

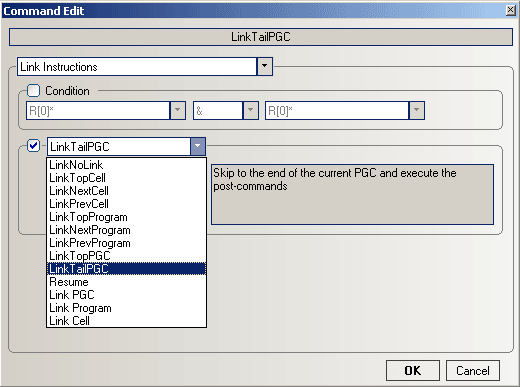
Step 3. All buttons of the original start-up menu had "LinkTailPGC" command. We need to change button commands in our new menu to LinkTailPGC. Just SHIFT+Double click on each button (in preview or buttons pane) and edit the command:

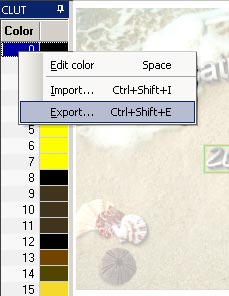
Step 4. To have same highlight colors as in the dummy dvd it is necessary to replace Color Table in Program Chain with start-up menu. First we switch to project with dummy DVD, select PGC with menu, select "CLUT" pane, right click in the table and export it to file (give it any name you want).

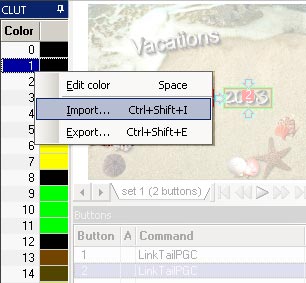
Now switch to project with merged DVDs, select "Root menu" PGC in last VTS, select "CLUT" pane, right-click in it and import CLUT from the file you’ve saved.

That is it. Now you have your custom start-up menu instead of default menu inserted by DvdReMake Pro.

|